Sunday, June 27, 2010

Manga Boy YOU ROCK! Card

Finally got a chance to ink up these new stamps from Sugar Nellie's new manga release.  LOVE that they are starting to come out with a bunch of new boy images!!  Here's a rocking out little boy...


I thought it was a perfect image from this unity stamp co sentiment, which I stamped inside


Papers are all very old school - KI Memories mostly, with a scrap from My Little Yellow Bicycle.

TFL!!


(**available in etsy store)

Saturday, June 26, 2010

Manga Girl birthday card

 Popping in with a quick card I made with a Sugar Nellie manga girl image and some basic grey....


TFL! Wendy


**available in the etsy store...

Thursday, June 24, 2010

Hip Hop 6-24-10


Happy Thursday!! Welcome to Hip Hop!!
I'm still enjoying my June Kit of the Month, Fly Free 


Now hop on over to Jen Buck
Next Blog


Enjoy your thursday!


(i design for unity stamp co)

Thursday, June 17, 2010

Hip Hop 6-17-10

Good morning everyone!! Welcome to Hip Hop!!

Today, I'm using the June Kit of the Month, Fly Free, to make a thank you card. 


Its odd sized - when I cut down my 12x12 paper to make a 8.5x11 layout, there is this strip left over that if you fold in half, makes a card that fits right into the normal mailing envelopes for regular mail.

I used my smooch to give it a little sheen


Be sure to check out all the other June KOTM goodness on the hop today!    Now hop on over to Jen Buck
Jennifer Buck:
Next Blog


Enjoy your thursday!


(i design for unity stamp co)

Saturday, June 12, 2010

Unity June 2010 Store Hop


Good morning everyone!! Welcome to June's Store Kit Hip Hop!!

It's just a gorgeous kit this month. I am using Life Becoming

And here is my sample, using the gorgeous new Le Romantique collection for Graphic 45

Be sure to check out all the other blogs on the hop today! 

Now hop on over to Jen Buck
Jennifer Buck:
Next Blog


(i design for unity stamp co)

Thursday, June 10, 2010

hip hop 6-10-10


Good morning everyone!! Welcome to Hip Hop!!

Today, I'm still playing with the June Kit of the Month, Fly Free making another clear card from the stack of transparencies I found when I reorganized my craft room.


(transparency is by hambly).  I hope you like it!! 

AND its a big new release day!! 


Check out the PAPERCRAFTS CONNECTION for a cool writeup - and they will be giving away one of each of these kits!!

Be sure to check out all the other blogs on the hop today! There are some samples with the new kits up!

Now hop on over to Jen Buck
Jennifer Buck:
Next Blog


Enjoy your thursday!


(i design for unity stamp co)

Tuesday, June 8, 2010

TIP - Altering letters

Just a quick tip.  Your alcohol based markers (BIC, SHARPIE, COPIC) work on any surface.  Remember them to assist in altering letters next time your color isn't quite right - and stretch your supplies further.

Here, the green just faded into the background of my layout way too much.   You can barely see it


A brown sharpie:

and it looks much much better


Monday, June 7, 2010

Tutorial - Clear Cards


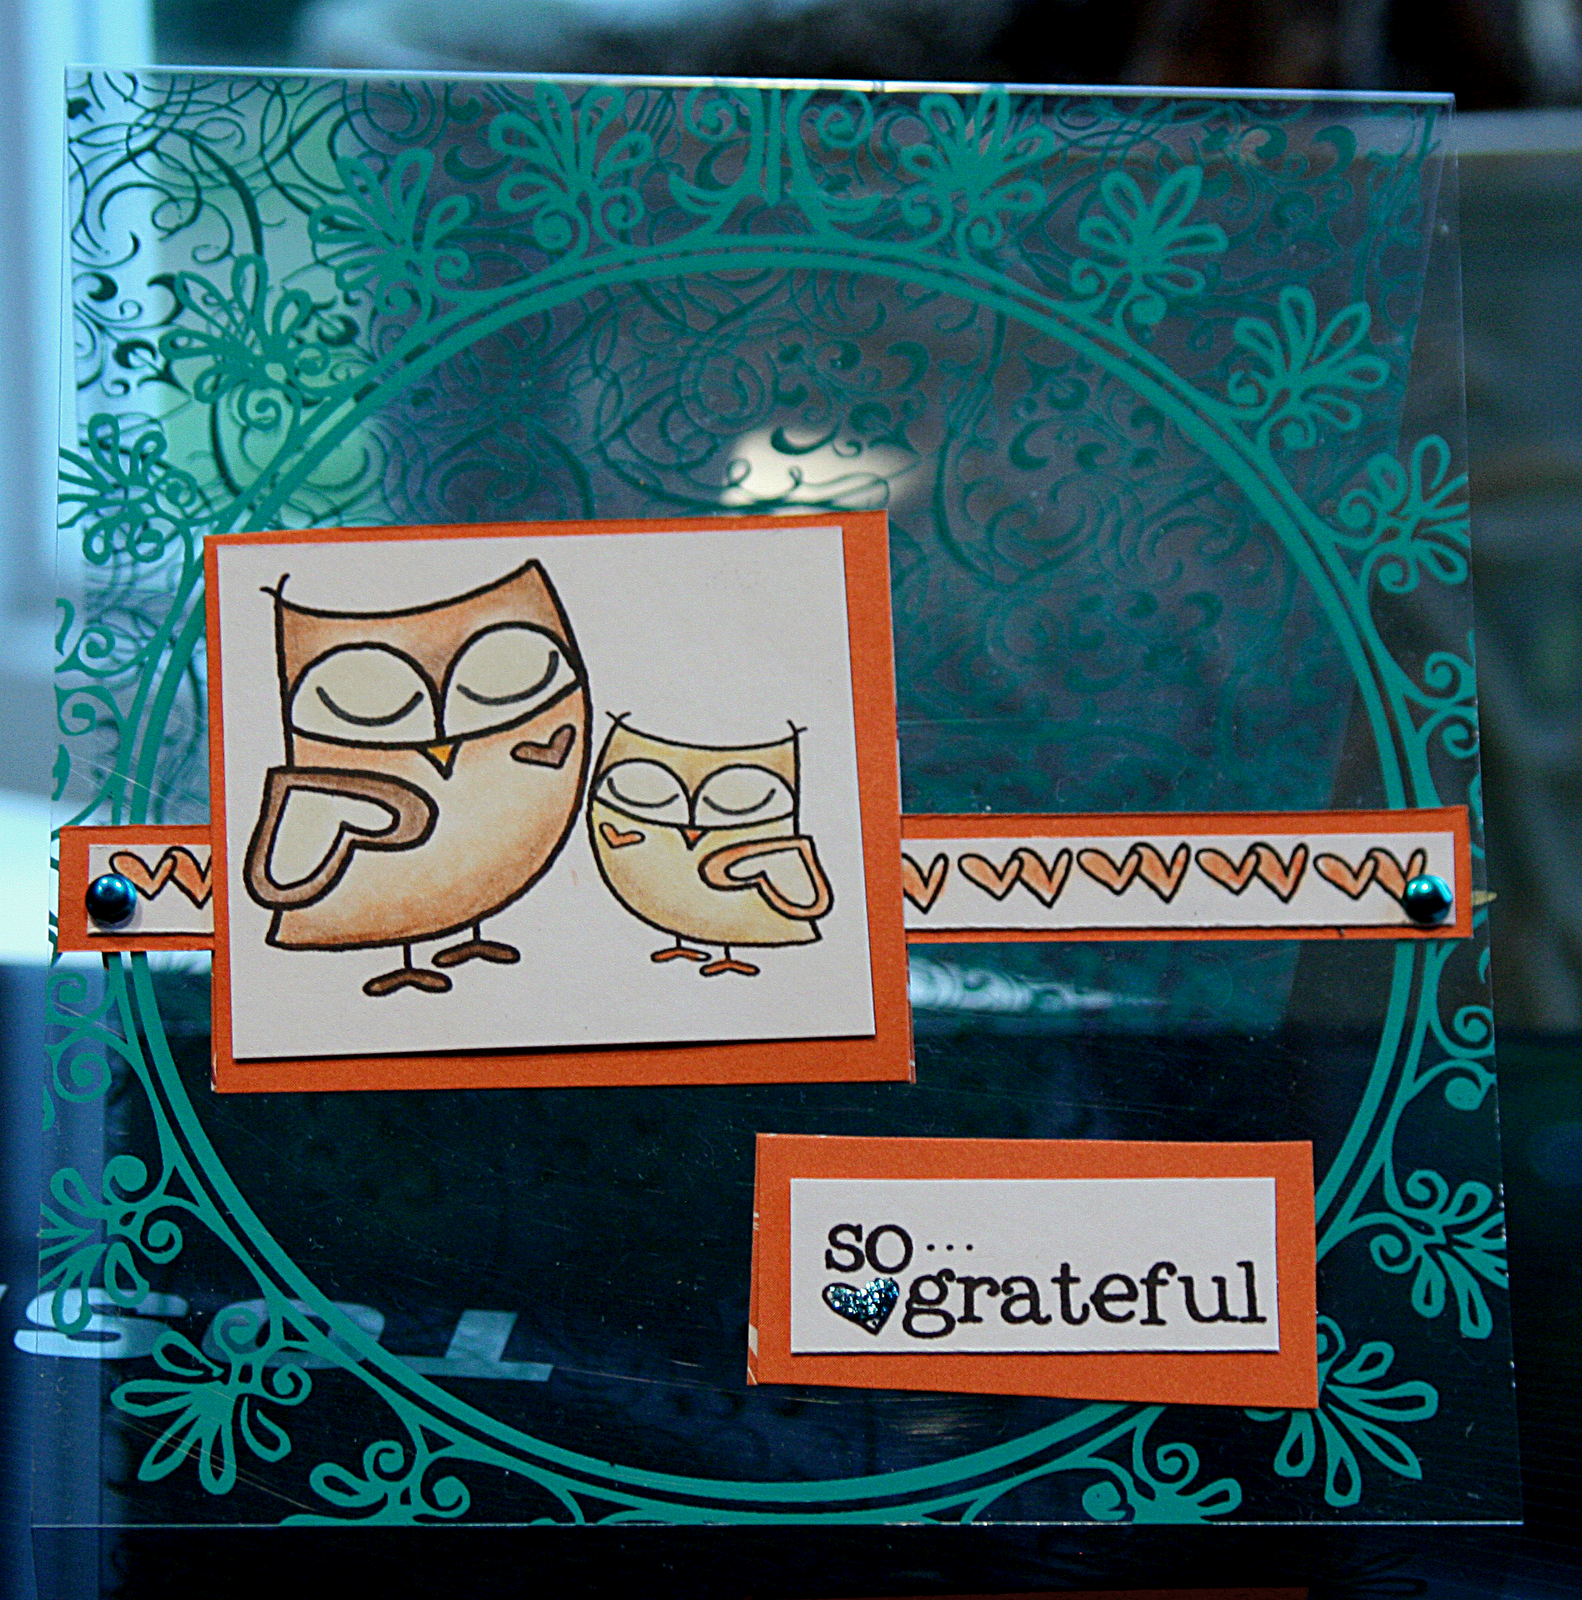
The Rubber Romance girls are so sophisticated and modern. What better way to send a hip handmade card than to make them clear?

It is easy to do, with the plethora of transparencies out on the market. Make sure they are thick enough to stand up on their own when tented.

The trick to clear cards is to remember you have to work with both sides of each addition so as to hide the adhesive tracks, etc. Thus, when cutting paper, remember to cut TWO, one for your image or element, and one for the back side.

Here, since it is the end of the school year and I need to make thank you cards, I chose the Teacher Teacher image.

Cut your card base just like any other card. Score in the middle, using a bone folder to make the fold extra crisp. Here, I am using a transparency from Luxe.


Color your image and cut into rectangle.

Matte the image to give it a frame on the clear card front. To make the letters look more chalk like, trace over them with a white gel pen. Cut a corresponding piece of paper of the same size.

Place your image to approximately where you want it on the card and punch a hole on the left side.


Weave your ribbon through the hole and tie a bow.  Next, adhere the image to the top, and with your corresponding piece of paper, adhere THAT piece to the exact other side of where you adhered the image on the inside of the cover of the card - this hides the adhesive tracks.  Cut a plain piece of white paper for the inside to write a message, and adhere. Adhere a corresponding piece to the backside of that sheet to hide the adhesive track.  Finally, punch your message and adhere. Attach corresponding piece to back side to hide the adhesive.


You're done! A quick card, but unusual with visual punch.

 Thanks for stopping by.


(I design for rubber romance stamps)

Thursday, June 3, 2010

Hip Hop June 3, 2010

Good morning everyone!! Welcome to Hip Hop for this first thursday in June!!

I'm playing with the June Kit of the Month today Fly Free - I absolutely LOVE these cute songbirds!!


Be sure to check out all the other June KOTM goodness on the hop today!    Now hop on over to Jen Buck
Jennifer Buck:
Next Blog


Enjoy your thursday!


(i design for unity stamp co)